Timo Sirviö
In this section (2 ECTS credits) you will build your own blog/web site by using the WordPress. That blog/site will be your personal learning environment, where you share all of the assignments with teachers, students and the whole world. If you have some problems with WordPress, please don’t hesitate to contact me – I recommend to use the contact form, which you can find at the bottom of this page. You can contact me also by email: firstname.surname@savonia.fi.
Introduction to WordPress
WordPress.com is a blogging and web page service. Today it’s the most popular blogging system/service on the web. This site which you are just looking is done also with WordPress. It provides free blog hosting for registered users and is financially supported via paid upgrades, services and advertising. WordPress.com offers a wide array of features for creating your blog or homepage. Check out features page for an overview.
In this course we are using the WordPress application, which is hosted by Savonia UAS. You will make first your own blog/website, where you will share all the assignments we are doing in this course. So each student will create her/his own web site by using the WordPress. On the site there will be six pages:
- HOME PAGE/BLOG PAGE – it’s for your blog articles (that’s automatically on your site)
- DIGI SOCIETY – for the digi society assignments
- DIGI CITIZEN – for the digi citizen assignments
- ePLATFORMS – for the ePlatforms assignments
- CV – your CV will be there
- CONTACT – your contact information
Your WordPress.com page will be linked to this (https://blogi.savonia.fi/dwe2016) site, so via this site you will be able to see how the others are done all the assignments. Here you find an example of how the structure of your site looks finally. – That’s the way we work.
Shortcuts
1. Create your own site/blog
2. Your sites dashboard
3. Configure basic settings
4. Add personal touches to your site
5. Create pages and posts
6. Some Links
1. Create your own site/blog
First we create your own site/blog, where you will do your assignments. Go to address http://blogi.savonia.fi and log in with your Savonia Campus account name and password.
If you don’t have a Savonia Campus account, you can also create your own blog site to original https://wordpress.com service. If you choose there (https://wordpress.com/pricing/) an free option you can do all the assignments there. Mainly all functions work in the same way as in our university’s WordPress environment.
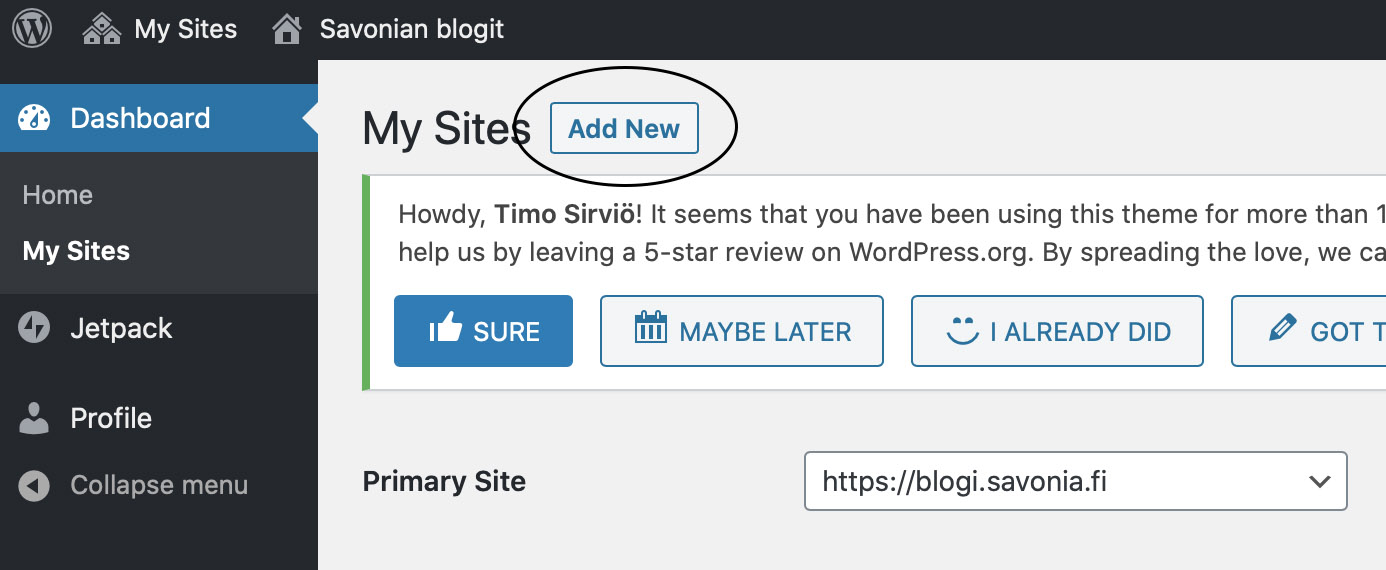
When you have logged in, click at the top left “My Sites” and then click “Add New“.
Then ccroll down the page. Give your blog an address by typing for example your name in lowercase, e.g. “liisaihmemaa“, when your blog address will be then “blogi.savonia.fi/liisaihmemaa” – so please write your site name carefully. You can always check your sites and design by typing that address to your web browsers.
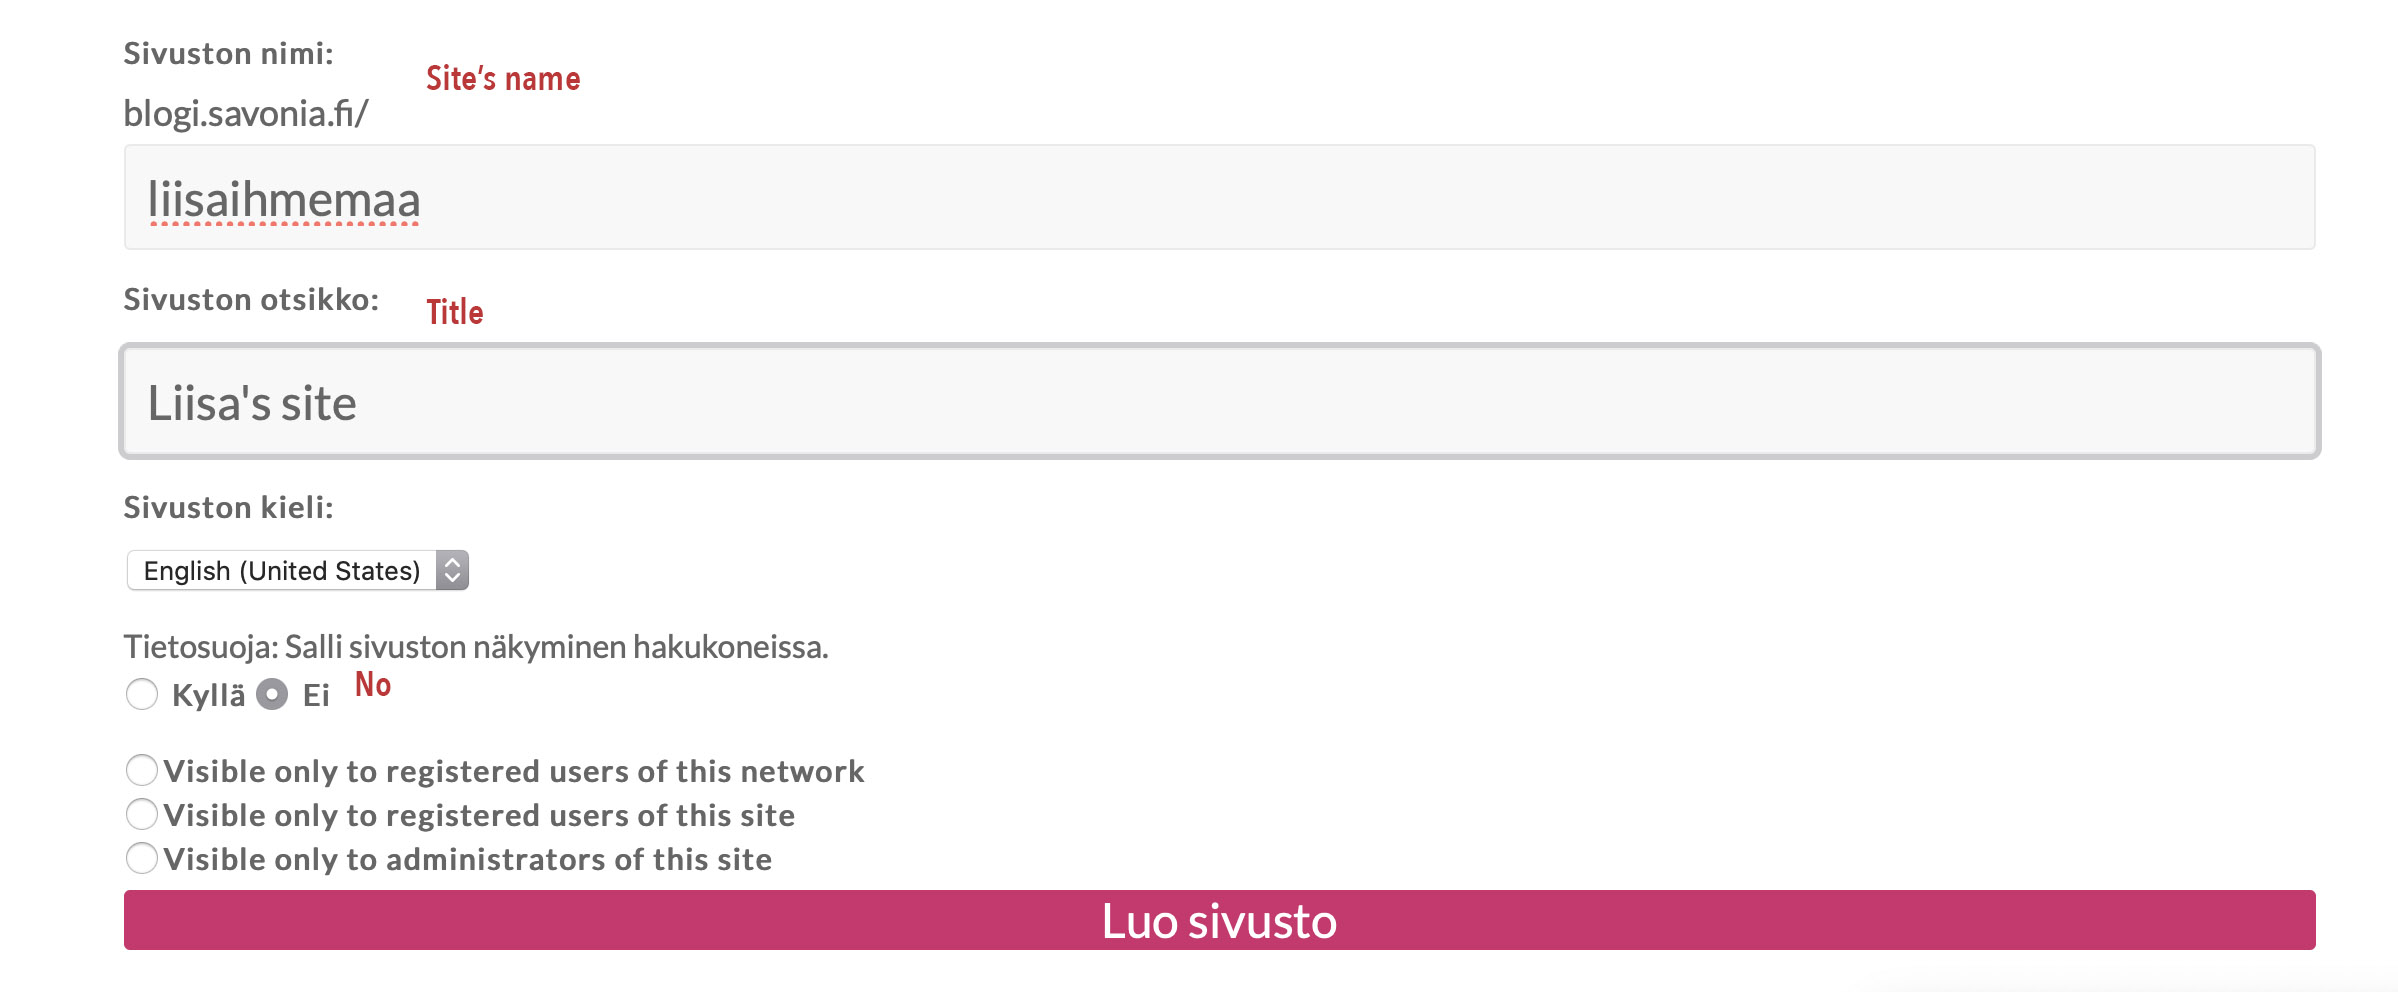
Next write a title (Site Title) for your blog, e.g. “Liisa’s site” – you can change it at any time later. Choose option “No” for Allow search engines to index this site… and finally, click “Create Site“. Now you have made your own site.
When you have created the site, please send the address of your site via e-mail to: timo.sirvio@savonia.fi – that’s very important!
Then click your blogs “title” to go to site’s dashboard.
2. Your sites dashboard
Now we go to the dashboard of your site by logging. The Dashboard is the administration area of your blog/site. If you aren’t already logged in to your account, go to your WordPress site and put /wp-admin at the end of the URL. For example, if your site is located at blogi.savonia.fi/liisaihmemaa, then go to blogi.savonia.fi/liisaihmemaa/wp-admin to access your login screen. Once you have accessed your admin page, it will look like this:
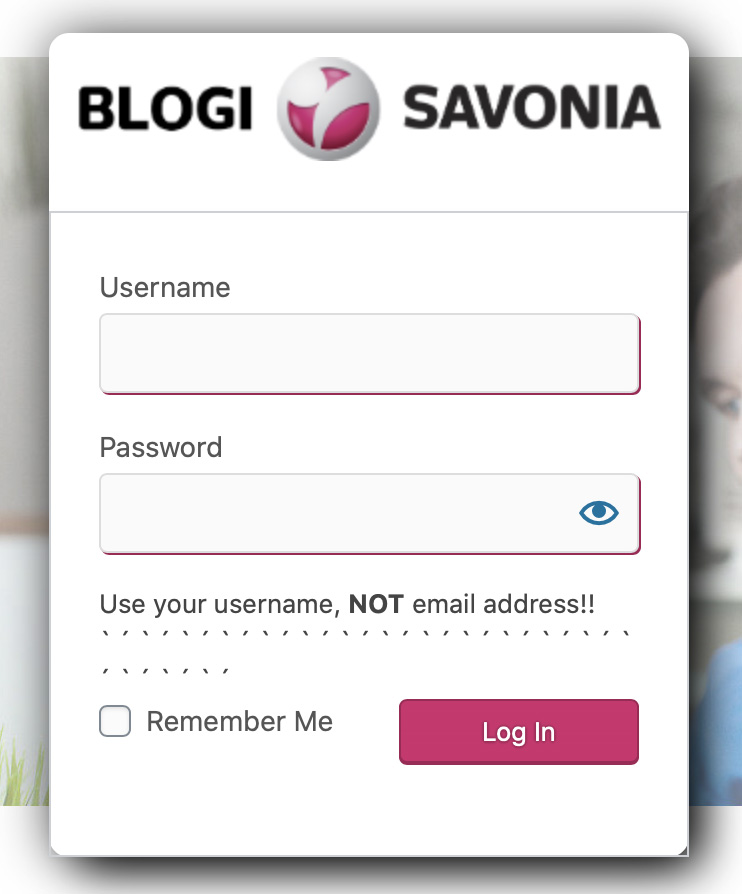
Enter your Campus username and password and click the Log In button. Then you will be in your WordPress’s Dashboard.
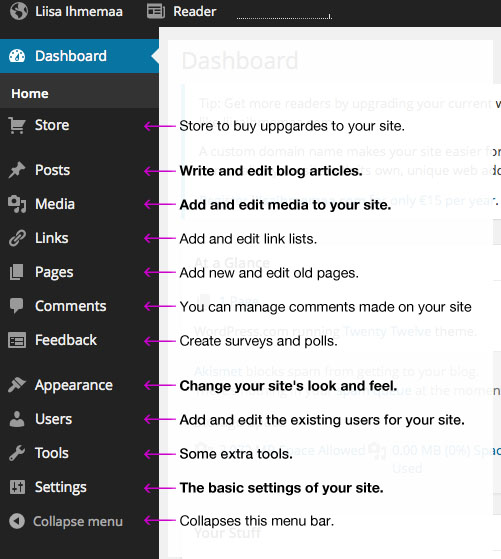
From the image below you’ll find the main menu features of the Dashboard. In this course you’ll need only the bolded functionalities.
3. Configure basic settings
If you haven’t done this at the start, you can do it now. When you are in your dashboard, one of the two most important settings you’ll probably want to do right away is your site title. When you have made your profile, WordPress has given your blog the same title as your username, but that might not be what you want , also you’ve got a generic tagline.
To configure those, go to main menu and click Settings > General, and enter your site’s title and your new tagline. If you don’t want to have a site tagline or can’t think of anything to enter right now, just delete the text that’s there.

Here’s how the site title and tagline look on the site. It might look a little different on yours, because every theme displays the title and tagline a little differently.

In this section, you can also set your site’s timezone, and choose a date and a time format; when we’re not in the US, you can have the date display in whatever format you normally use. You can also select the day the week starts on and the language for your blog.
4. Add personal touches to your site
You can customise your blog more attractive by changing the header or background.
If you want, you can change the look of the site by changing a sites theme. A theme is a template for your site and it creates the layout. You can switch the theme whenever you’d like. You can learn more about themes here.
Please note that some of the themes doesn’t display a menu by default. So if you want to use that kind of theme, you have to set up a Custom Menu. It’s maybe little bit complicated, but here you can find instructions for that: http://en.support.wordpress.com/menus/. – And, if you don’t want do that, you can just try another theme which diplays a menu by default:)
5. Create pages and posts
Posts are dated, and they appear in reverse chronological order; as you publish new posts, older posts get pushed down the page. Pages are more static and are not listed by date. You can read about differences between Posts and pages here.
First we will make five different pages to your site:
- DIGI SOCIETY – for the digi society assignments
- DIGI CITIZEN – for the digi citizen assignments
- ePLATFORMS – for the ePlatforms assignment
- CV – your CV will be there
- CONTACT – your contact information
You will edit these pages (DIGI SOCIETY, DIGI CITIZEN & ePLATFORMS) during the course by writing your assignments there.
Let’s create first the “DIGI SOCIETY” page. Head into your dashboard and make your way to Pages > Add New. This will pull up the page screen, which works a lot like your word processing software.
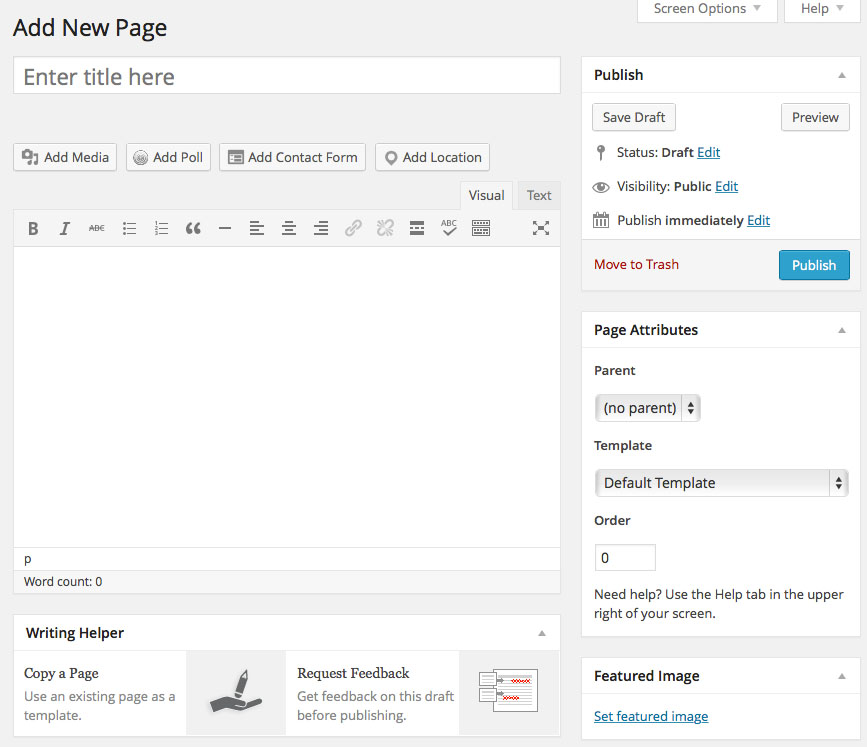
There are a rows of icons in the visual editor. You can find out what any one of them does by hovering over it with your mouse; a pop-up text will appear telling you what it is. Many of them are familiar with your word processing program — bold and italic text, justification options, bullets, and more. You can find a comprehensive tour of all the options here.
Click to Enter title here and write “DIGI SOCIETY”. Title will appear to your sites main menu and it will be the main heading of the current page. Then click to empty text area and write for example: “An orientation assignment will appear here soon.”
Other key tasks you can do in the dashboard editor are located on the right. You can change Page Attributes.
Parent | You can arrange your pages in hierarchies. For example, you could have an “Scandinavian Countries” page that has “Norway” and “Sweden” pages under it. There are no limits to how many levels you can nest pages. Choose “no parent” option, because this page is on the top of the hierarchy.
Template | Some themes have custom templates you can use for certain pages that might have additional features or custom layouts. If so, you’ll see them in this dropdown menu. Choose the Default Template.
Order | Pages are usually ordered alphabetically, but you can choose your own order by entering a number (1 for first, etc.) in this field. Put there order number “2”, because the “DIGI SOCIETY” page is second page after “HOME” page.
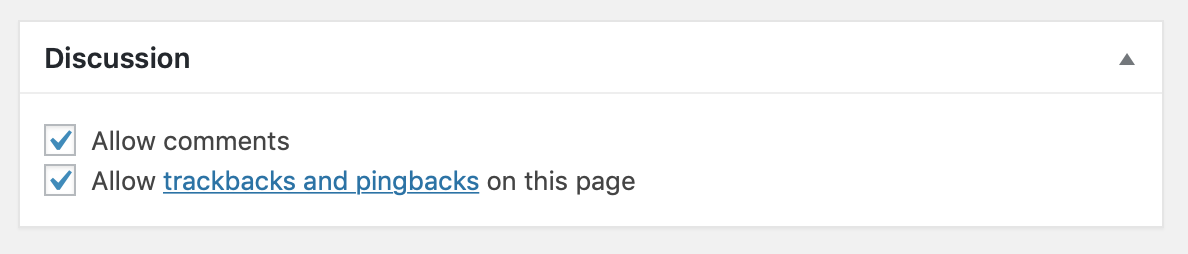
Discussion | Please choose always “Allow comments”, because other students in the course will comment on your articles. This is Important!
The Publish module on the right is your command center, where you control who sees a post and when it goes live. You can preview a page before publishing it by clicking Preview at the top right of the box. If you’re ready you can publish your page by clicking Publish button (– once you have published the page Publish button will appear as Update button). By clicking the Move to trash you can delete the entire page. Click Preview to see how the page looks. Everything ok with the page? Head back into your dashboard by clicking top left menu’s wp admin and make your way to Pages > Add New. Then create the following pages (with order numbers):
- DIGI CITIZEN – for the digi citizen assignments (order n:o 3)
- PLATFORMS – for the orientation assignment (order n:o 4)
- CV – write your CV there (order n:o 5) – remember to do this page, too. You can write there an short outline of your educational and professional history.
When you have created the pages. Go to dashboard and choose Pages > All Pages to see the list of all pages you have on your site. You can edit now the “Tietoja” page by roll over the cursor the “Tietoja” link and the choose the Edit link.
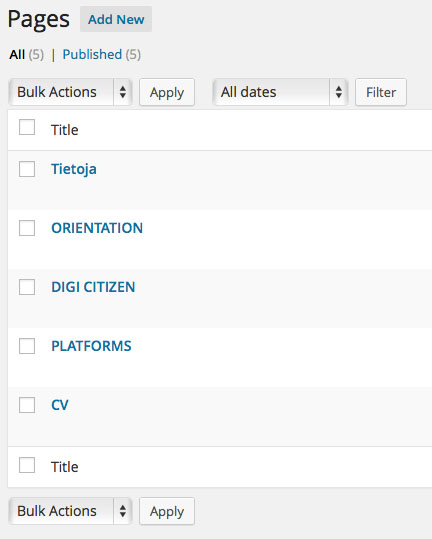
On page editor change the page’s name to “CONTACT” and write your contact information on the text field. Put he order number “6” to Page Attributes panel.
You can check your sites and design by typing that address to your web browsers. If you can’t see your pages on browser, but they exist in the dashboard – it may be so, that the theme does not allow pages, i.e. that theme is designed only for a blog and you have to change your theme.
If you can’t see the pages in your menu
Go to My Sites → Design → Customize → Menus. There you can edit your menu or create a new ones. When your theme already has a default/primary menu, you can click on it to edit it and you see the pages included to your menu. When you have already made pages to your site, you can add them to the menu by clicking ”Add Items”. A pages list of all pages will now appear to the right side of the menu panel. You can drag and drop pages from the list to the menu. In the same way you can organize the menu items to correct order. You can remove a page from the menu list by clicking it open and then click Remove. When you are done, you can then save your changes from the top left ”Save Changes”.
Congratulations! Now you have completed the first part of this course and you have an web-page, where you write down the rest of the homework.
When you are ready, please send the address of your site (for example: https://blogi.savonia.fi/liisaihmemaa) to timo.sirvio@savonia.fi by e-mail, then Timo will put your site’s link to the bookmark list. From the list of bookmarks you can find the other students’ sites and their assignments.
Some Links
Here you find some links for materials concerning WordPress.com platform.